


Hello. It's me again, Vermil. What, you've never seen me before? Too bad, because I will now attempt to stomp all over the tradition of /newstuff... ah forget it, I can't compete with him for intros. On with my attempts at reviews.
-
1 Monster Megawad - Various
Boom Compatible - Solo Play - 7358 KB -
I think everybody here knows about this wad given how long it has been in the making. What we have here is 25 maps made by the community, where each map only uses a single bad guy type. Though it isn't mentioned anywhere in the read me, I assumed each map was suppose to be played from a pistol start and did just that.
Map1. Nice looking and very short map. But the game play was mainly just a few rooms of blocks of bad guys.
Map2. Different setting and Imps instead of Zombiemen. However the game play is pretty much as repetitive as Map1.
Map3. A relatively simple layout, but with a good choice of custom textures that makes things look more detailed than it actually is. There is some interesting use of conveyor belts, but generally very little in the way of surprise and more than enough ammo. The main challenge here comes from the lack of health.
Map4. Repetitive Imp map. Elaborating, most of the map is just a series of 64 unit wide corridors with pointless detailing. Given that you get a Chainsaw right near the start, you can just run down the corridors sawing almost anything that gets in your way. The one interesting room is the courtyard where the stairs can render the chainsaw useless if you use a port that allows you to turn off infinite height.
Map5. An enjoyable map. Pretty much every battle makes good use of the Demon. Even the obligatory swarms are handled well. A little observation can make this map much easier, perhaps too easy (for instance there is hidden chainsaw that I would consider overkill).
The ending is very creative reminding me in a way of the traps of Dungeon Keeper. However it is possible to defeat the final battle by just standing behind the bars prior to the arena and punching through them.
Something interesting is that there were lot's of power ups directly under barrels. Though being Doom, you can pick them up without exploding said barrels.
Map6. I think "nothing spectacular" describes this Imp map. It is nice looking and has competent game play, but lacks anything that stands out. The style of play is also too similar to Map5, further dulling its appeal if you play this one right after.
Map7. This short map makes you feel somewhat like a lab rat as the battles with the Arachnotrons are tightly controlled (i.e. you'll always do exactly what the author intended). A nice mix of grey walls and blue flat's gives the map a somewhat sterile feel.
Map8. A relatively small map featuring several small-scale filler battles that build up to the main meal of a couple of large, but not particularly tactical battles beyond the red key door.
Map9. Visually this map is in my opinion the perfect theme for the Lost Soul, which is really put to great use here with them teleporting into several areas of a steadily expanding arena (hence there isn't any exploring to be done). The final battle may well be too difficult without the map's sole secret though (unless you're very good at dodging all over the place).
Map10. Not a particularly attractive map and it's pretty obvious what is going to happen next. However the use of the Elementals and Lava is generally good. Follows a similar flow to Map8 really. I have to say I found the music for this map pretty annoying though.
Map11. Take a large empty open area, fill it with Spectres and give the player a Berserk pack. Repeat several times and you've got this map. The map does have a unique setting though.
Map12. Cheesy music aside, the very small amount of ammo on this map requires that you be a bit selective with which Barons you take out, lest you spend a long time playing with your Berserked fists. Speaking of the Berserk, I would have placed it somewhere a bit more obvious given that you basically need it to complete the map.
Map13. A dark and slightly decayed tech base/underground base filled with Chaingunners. It would have been great if the eyes of Chaingunners glowed in the dark, but I'm wandering off subject...
The bad guys were placed very effectively so they wouldn't get into each others cross fire requiring a fair bit of sniping from the player (there's no charging into battle here, not just because of the foe). I can't really think of anything else to say about this map other than it's a good one.
Map14. Not the greatest map in any area. The inside part doesn't really allow for much in the way of tactics beyond standing in the door ways so the Viles don't get into the main corridor. However the outside areas were more enjoyable allowing the possibility of dodging in and out of crates taking pot-shots at the foe.
Map15. A Spectre populated Blood style haunted house map that relies on very tight ammo rather than massed swarms. It works very well, though you may end up punching a few Spectres with non-berserked fists.
Map16. The "piles" of snakeskin textures in this map really make the Mancubus fit into this map. There is also interesting use of a somewhat unrealistic conveyor belt to get around. However the game play of this map sadly didn't live up to the visuals in my opinion, simply because there just wasn't enough opposition for a map this size.
One thing, I didn't get though was the huge scale of the living area (I don't know anybody who's 25 feet tall).
Map17. A marble theme isn't the most common place for Heavy Weapon Dudes. Visually this map looks great, though its scale may on occasion be too large for its foe. Game play relies a bit too much on trial and error with groups of bad guys often appearing from nowhere and taking you down before you can react.
Map18. A slow start builds a little suspense for this map. I liked the appearance of the third Hell Knight the player faces, though the map becomes a bit predictable after a certain point. I can't help but wonder if maybe, this map would have actually been better as an Arch Vile map...
Map19. A very long and very bad guy filled Cacodemon map. The first part of the map isn't particularly creative and doesn't really make much use of the Cacodemon's strengths, tediously relying on Shotgunning and Berserking in areas with low ceilings. However things pick up later in and after the blue key room where the author starts making use of the Cacodemon's mobility.
There are some very impressive looking visuals on this map. I liked the ledge running below the arches near the end for instance.
Map20. The main challenge here comes from running past snipers rather than face-to-face battles. The map does well to reuse areas of the map more than once, meaning bad guys you leave behind may well come back to haunt you again later. Against it, some traps may be too difficult if you don't have ammo for the right weapon available (the yellow key trap may well be impossible with a Shotgun).
Map21. A series of controlled scenarios with Cyber Demons (i.e. like Map7). There isn't anything that hasn't been seen before.
Map22. A short "puzzle" map that has you running past the field of view of Masterminds hoping they don't decide to attack you as you are. Well obviously there is more than that, but I'm not going to reveal everything. Suffice to say that you get your own back.
Map23. Where as the first Arch Vile map generally gives you enough ammo to do the dirty work, that isn't the case here. You will probably end up in melee (maybe it is different if you start on the other side of the map though). A nice choice of music complements the ambience. The lava area seemed a little out of place and a bit annoying (i.e. falling off).
This map also contained the only texturing mistake I found in the wad. Shame on the author :p
Map24. An Icon map in name only. Nicely done, if a little tight on time.
It might have been nice to be given some indication of how much time you have at the start of the map. Also the perfect movement required by the final hurdle seemed a little odd where previous challenges give a little margin for error.
Map31. A fairly leisurely Wolf SS map (even more so if you go secret hunting). It follows its inspiration pretty closely with a simple layout (albeit with lots of unobtrusive visual detail added) and a scale that is huge compared to its occupants. Unlike the other maps in the wad, you can complete it while only covering a small amount of the map.
-
Back Me Up - Magicsofa
Limit Removing - Solo Play - 157 KB -
The wad's read me sums these up as "Short, simple maps". I can't think of any other way to describe them.
The wad may only take a very (very... etc) short time to finish and is nothing memorable in the slightest, but its very well crafted, somewhat difficult, fun all the way.
-
Console Doom Resource Pack - Ripped by Samuel Villarreal (Kaiser)
Limit Removing - n/a - 310 KB
There isn't really much to say about this one. It's 99% of the unique graphics from the Jaguar and PSX versions of Doom. They look well ripped and usable to me. 'nuff said.
-
Corruption 2 - Doomaniac
ZDoom Compatible - Solo Play - 259 KB
A tech base slash excavation site (which as expected finds bad things) that uses every style of tech base possible, fortunately not all in direct contact with each other. There isn't anything that will make you go wow here, but it's a mostly good looking and fun, if not that difficult map, from start to finish.
I will point out the lighting though. There is very little lighting variation here. Nearly everything is extremely bright. This in my opinion really harms the atmosphere, especially given the dark sky.
Off topic, are the light amp goggles in Gzdoom suppose to make everything look like a cross between a rad suit and invulnerability? I only noticed it when I picked up the rather unesscerry goggles at the start of this map. But I've checked that it occurs in Doom2 as well.
-
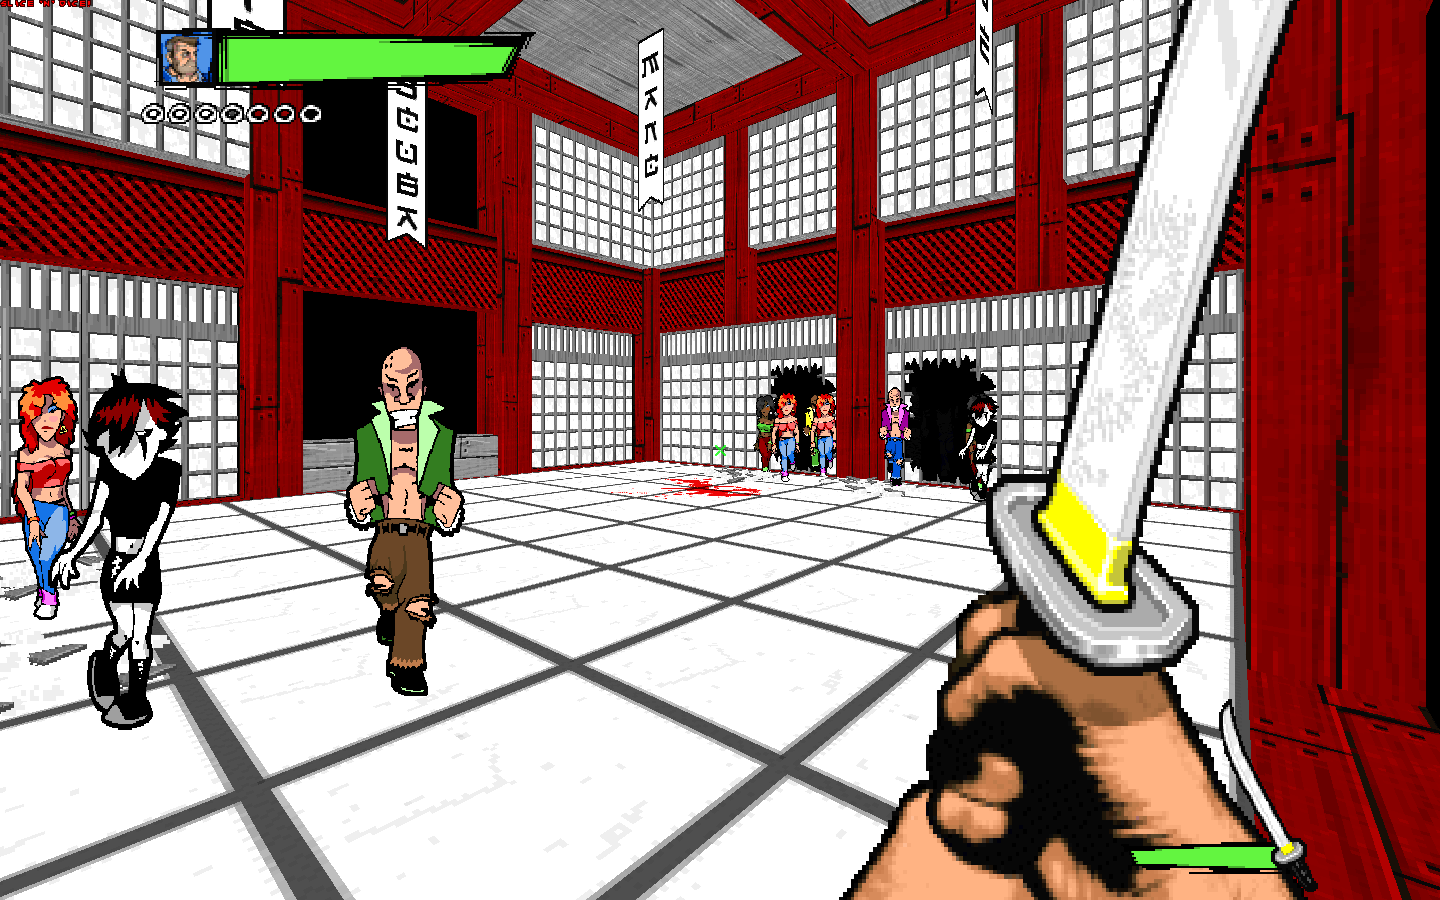
Daimon Dojo - Walter "Daimon" Confalonieri
Skulltag - Deathmatch - 1604 KB
I haven't seen the Matrix (gasp!), so I can't comment on the visual accuracy of the map. I also don't play Doom online, however I can comment on how well this DM map plays with bots.
The map is a large rectangular room with a pillar in each corner. There is a fifth pillar in the centre that lowers when you go near it, containing a random sphere power up. Every weapon except the BFG is somewhere on the floor.
I didn't think a large mostly open rectangle made for a memorable DM map before I played this (with bots in SP). I'm sorry to say that I still think the same. It is a nicely textured rectangle though and it does come with new music.
-
Gamarra's soul story: Mission 6 - Giulio Galassi aka Glassyman
ZDoom Compatible - Solo Play - 599 KB -
Why bother.
-
Gamarra's soul story: Mission 7 "Glassyman's Nightmare" - Paul Corfiatis
ZDoom Compatible - Solo Play - 660 KB
See above.
-
Hurry! - Crystal Jacobs
doom2.exe - Solo Play - 18 KB
The aim is to run down some long health damaging corridors as quickly as possible while dodging or killing/destroying various demons and barrels.
Seemingly impossible to beat on anything other than the lowest skill (where damage taken is halved) It's fun for about 10 seconds, which is probably how long it took to make.
-
KSSC V3 - Samuel Villarreal (Kaiser)
Strife Support - n/a - 60 KB
From the readme:
"KSSC is a script compiler for Rouge Software's Strife with support for Vavoom, Zdoom and SvStrife."
This is a new version with major changes over the last. I don't think there's any more to say on this one.
-
Masturbation Magazine 1 - Jodwin
Boom Compatible - Solo Play - 530 KB -
Joke text file and title image aside (that's all I'll say on those), these four maps are slightly unusual but mostly decent maps (albeit not very attractive) that put the player in some difficult situations. All the maps are meant to be played from a pistol start.
Map1 is a straightforward and 99.999999...% (you get the idea) right angled, slaughter map that relies heavily on cross fire to thin out the hordes (and a little patience). Certinally, the starting battle is probably the hardest part.
Maps2 and 3 are sprinting maps, the former being an interesting map taking place series of red rock platforms above lava and the later being a timed scenario. I personally couldn't complete the timed part of Map3 in the time available without cheating to get some heavier weaponry.
Finally Map4 gives you a Rocket Launcher and later a Shotgun against predominately Demons and Lost Souls in a canyon of sorts. The Shotgun makes things too easy.
-
Mutiny Mod - Woolie Wool
ZDoom Compatible - Solo Play - 5085 KB
There is a syntax error in one of the lumps that prevents this from working if not fixed.
Anyways, after I fixed the error so I could run it...
Edit by Bloodshedder: Good Lord, didn't you read the text file? It needs the latest SVN version of ZDoom or GZDoom 1.0.29.
A weapon and bad guy replacement/resource wad for GZdoom (the author can't seem to make up their mind according to the read me) [Edit: see above] featuring the usual assortment of ripped graphics. Apparently the author may make a level wad for them at some point. If so, why spoil all the bad guys and weapons before hand?
The bad guys are the usual assortment of marines with the usual assortment of weapons (pistol, shotgun, chain gun etc). There's also a few Robots and sentry droids with the large missiles and lasers respectively.
Most of the "new" weapons are simply faster or more powerful versions of the standard Doom weapons. The actual new "new" weapons are the usual grenade launcher and rail gun. A modified BFG blast launches a ring of plasma when it explodes.
Finally there is a small inventory consisting of a handful of Doom's standard items and some hand grenades, which appear to travel further than the grenades from the grenade launcher.
The new blood splatter effects were pretty well done though and fairly fitting.
-
Phobos Reloaded E1M1 - DJShrimpy
Limit Removing - Solo Play - 367 KB -
A remake of E1M1 that was apparently going to be part of a failed Episode 1 remake. The majority of the map's layout is not as much a re-interpretation of E1M1 as much as E1M1 with lots of additional detail that gives it a very different atmosphere from the original (i.e. it's much brighter and cleaner than anything in Episode 1). The game play also differs a fair bit from the original with large numbers of Imps and the presence of all three key cards.
In short, I would say that author changed the wrong things for a remake.
There is also a single room level (well pretty much) on E1M2 with an unknown texture that will crash many a port.
-
Quake Mod Alpha Version - lafoxxx
Multiplayer - Deathmatch - 498 KB
Sped up bullet weapons. Changed weapon and player sounds. New flats for liquids. Even that makes it sound like there is more to this mod than there actually is.
Most of this mod will work in any port. (Only liquid animation and a few of the sounds require ZDoom features).
-
Rise of the Scorned - Andy Leaver
Multiplayer - Deathmatch - 111 KB
The read me claims this map as requiring ZDoom, but I see no reason why the map won't work in any port that supports a frag or time limit (there is no exit).
I am unaware of how to convert the map to be playable on Skulltag with bots. Hence I'll leave this one to deathz0r for a proper review when he next does /newstuff (since as I understand it, he does play online).
-
ShizzMasteR Weapons 2 - Evan "ShizzMasteR" Holt
ZDaemon - Deathmatch - 549 KB
A weapon mod for ZDaemon using graphics ripped from various other sources. I personally don't know how to use ZDaemon, but fortunately the weapon set APPEARED to mostly work fine in GZDoom (I also tried it in Skull Tag with little success), so I gave them a quick test in single player GZDoom.
Triple Rail Gun Thing: Doom64's BFG, except it fires three Rail gun shots. Powerful, but doesn't auto aim.
Pistol: A faster firing handgun.
Shotgun: A faster firing shotgun.
Shotgun 2: A more powerful faster firing shotgun.
Rocket Launcher: Speaks for itself. Large splash damage (despite the missile graphics).
Triple Rocket: Fire three rockets at once! (with a small spread).
Flamethrower: As usual it leaves a small damaging fire where the missile explodes.*
Magic Spell: Who knew a marine could cast magic spells? Anyways, this hitscan weapon takes up loads of ammo and burns and kills everything on the screen.
* This weapon is the only one that didn't appear to work 100% in GZDoom. But when it mostly worked, this was how I think it was suppose to function.
As you can see, they aren't very creative. The wad also comes with some god-awful blood splat replacement graphics from Mortal Kombat and a couple of new sounds for pickups and gibbing (which contain annoying profanity).
-
The Gudla of Hell - Ruba
Limit Removing - Solo Play - 71 KB -
Your mission is to find the Blue Skull Key by travelling through one SP_HOT textured square room (to be fair, there are also rectangles and L-Shapes) after another filled with seemingly randomly placed bad guys. Then when you finally find the elusive Skull key, you will find the map's "gimmick", which you may find extremely difficult or you may find extremely easy.
Where as wads like "Hurry!" at least have some adrenaline from the timed scenario, you'll find nothing here to keep you playing.
-
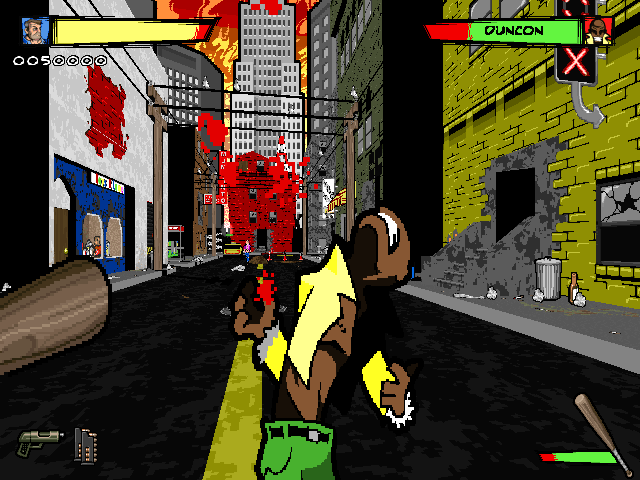
The City of The Damned: Apocalypse - Daniel "Tormentor667" Gimmer
GZDoom - Solo Play - 24584 KB -
I did think about leaving this map for deathz0r because of him and Tormentor's "special" relationship.
This is the first TC map I've ever played by Tormentor and I must say it left me both very impressed and very frustrated.
The wad predominately uses graphics ripped and modified from Blood to excellent effect to create a mostly abandoned town being used for dark purposes. I particularly liked the hospital, which felt especially desolate. My only nitpick would be that one of the cultists didn't really fit in with the rest.
The objective of the map is to collect three artifacts, the results of which perhaps is a bit odd given what you are trying to do.
It seems that while the town is designed with several unqiue structures (such as a hospital, library, church etc), no real use of them is made of them by the level progression (well except the tent, which has quite a surprise). You could switch the order that the player collects the map's keys and nothing would really be out of place.
The game play though good, is perhaps not quite spot on. There is nothing wrong with the general premise of making the individual bad guy powerful and for the most part it succeeds. However the stats of a couple of bad guys cross the line to become annoying. For instance the cultists practically shrug off attacks until they die. I won't go into detail on the other foes for spoiler purposes. But they are all tiny tweaks that I feel would have really helped playability.
-
Tuning Contest WAD - 3EPHOEd, Daimonreloaded, Eternal, Far, Wraith
Boom Compatible - Solo Play - 3788 KB -
The results of a contest. The aim was to take an oblige-created map and spruce it up. The results were 7 maps.
Edit by Bloodshedder: I'm honestly surprised Ty allowed this into the archives.
In any community project, there will likely be a range of mapping skill levels. However, here, the difference is pretty large. As with the 1monster project, I assumed that each map was suppose to be played from a pistol start (again the read me makes no mention of this). Also included in this wad are both Dehacked and Mapinfo patches that display the correct map names on the automap.
Map1: The original oblige map. Nothing more to say.
Map2: This is basically the oblige map retextured with some tiny alterations. In all honesty, though the texturing does notably improve on the oblige map, if I was running the competition, I probably wouldn't have accepted such a basic edit.
Map3: It looks nice enough, though the lighting is pretty basic. However I found the game play the weakest of all the maps, including the oblige map. It simply has no challenge at all. I also think it suffers being alongside the later maps in the wad.
Map4: The red door is very much the divide in this blood and wood map. Before it I found this map very enjoyable and a fine example of good texture choices (the age old saying that if your textures are well chosen you don't need loads of detail) with a relatively high difficulty due to tight ammo placement. After the red door, everything drops slightly, but it's still a great map all round.
Map5: The visuals of this version of the map have been changed to represent a destroyed structure, the result of which is very very impressive attempt at realism (excluding being able to fire through the windows) at some points. However the actual layout and game play is very much the oblige map which brings it right back down.
Map6: Words cannot describe the progression through this map. Initial impressions are a hodge podge of various random shapes and randomly textured rooms (though I guess you could call it a base theme if you really want to). However once you get a little way in, you begin to see some of the most creative use of raising and lowering floors/ceilings I've ever seen. There are some very creative puzzles in this map that is perhaps the furthest removed from the base map of them all. It goes without saying that players who like combat may not like this one.
A final note, I did manage to break part of this map when I left a certain bad guy alive (it's pretty obvious who). So save often!
Map7: There are some pretty nice custom textures in this map including some excellent wall lights. I was expecting a gloomy prison of some sort when I first began this map; instead the theme is fairly random and doesn't really take any advantage of said textures. Though there wasn't much difficulty here because the rooms were fairly open.
Map8: To finish with, a HR style map. The black tech and red hell like walls give the level very unique appearance and the reuse of old areas means that even the large amount of backtracking isn't so bad.
Against the map however there are some notable choke points that the player can use to make things much easier. The final battle is also anti-climatic.


Recommended Comments
Create an account or sign in to comment
You need to be a member in order to leave a comment
Create an account
Sign up for a new account in our community. It's easy!
Register a new accountSign in
Already have an account? Sign in here.
Sign In Now