-
Content count
3482 -
Joined
-
Last visited
Content Type
Profiles
Forums
Downloads
News
Everything posted by Spectre01
-

The DWmegawad Club plays: Realm of Chaos 25th Anniversary Edition
Spectre01 replied to dobu gabu maru's topic in WAD Discussion
MAP06 - “Splatterhouse” by Steve Duff When I see a vanilla map with over 400 monsters, it's either a behemoth of classic gameplay or there is one huge fight. The latter is the case here, with the blue key unlocking a ton of resources and some slaughter outside. There is enough space to run around and provoke infighting, though the Zombiemen give a reason to shoot back. This level is a massive improvement over the previous maps in nearly every way. The non-linear layout and architecture are significantly more interesting than some of the boxy rooms connected by tight hallways in the maps before. The one thing holding this map back is the late placement of the SSG, which makes the start rather slow. -

The DWmegawad Club plays: Realm of Chaos 25th Anniversary Edition
Spectre01 replied to dobu gabu maru's topic in WAD Discussion
MAP05 - “Mission Control” by Slava Pestov Interesting start with the group of Sergeants and barrels. Good thing there's a Berserk right after because I was at 30% HP from that fight, since I didn't get the crate secret right away. Similar to the previous map, there is a lot of low-tier fodder to mow down with the Chaingun. It would've been nice to get the RL earlier against the mid-tiers, since there isn't much left to kill once you get it before the Mastermind. The boss itself doesn't do much stuck on that platform, and killing it is peaking with the SSG from behind a pillar. Not a big fan of the visuals or layout in this one. The walls are usually the same pipe or Startan texture across the entire room and geometry is minimal. -

The DWmegawad Club plays: Realm of Chaos 25th Anniversary Edition
Spectre01 replied to dobu gabu maru's topic in WAD Discussion
MAP04 - “Sewers” by Jim Bagrow Some tough encounters here, especially the opener and the room with 3 Viles. Thankfully, there is plenty of ammo and the Megasphere allows you to take some bad hits. The visuals are very abstract, even by 90s standards. It's less of a sewer and more like rooms with nukeage and surreal geometry, including a Hell area. I like the Caco fight in the X-shaped room but those 8 monsters in the teleport closet never showed up. -

The DWmegawad Club plays: Realm of Chaos 25th Anniversary Edition
Spectre01 replied to dobu gabu maru's topic in WAD Discussion
MAP03 - “Mars Base Alpha” by Clint Sago and Rob Berkowitz Quite the hot start with those shotgunners facing you. Guaranteed to take some damage there. The map mellows out once you get the SSG as none of the traps are particularly mean. The Arachnotron + Pinky setup tries to get you by forcing you into the Chaingunners, but it's easy enough to run back and line-of-sight the Arachnotron while blasting the Pinkies. It's nice that there is a crusher for those Barons, but that was found after shotgunning both. The two Hell Knights before the exit aren't fun to fight because of the stairs and how narrow they are. This map is easily better than the previous two, but it's still heavily square with monotonous texturing. The blue flames from the Mancubus look really cool, too. -

The DWmegawad Club plays: Realm of Chaos 25th Anniversary Edition
Spectre01 replied to dobu gabu maru's topic in WAD Discussion
MAP02 - “Outpost 27” by Antoni Chan Not a fan of this one. It's cramped like a 1024 map and monster placement is in your face as you open doors. There is a Berserk, but the rooms and hallways are too narrow to have fun dodging enemies as you punch them. Very little to enjoy for me here. -

The DWmegawad Club plays: Realm of Chaos 25th Anniversary Edition
Spectre01 replied to dobu gabu maru's topic in WAD Discussion
I haven't played the original Realm of Chaos, but I'm sure those that did will have more interesting writeups as they get to compare the two versions. I'll mention right away that I strongly dislike the way most 90s maps play from a pistol start. It's like the weapons are scattered at random instead of placed before an encounter where they are needed. Hopefully that's not the case here. DSDA-Doom, UV, Pistol Starts with saves. MAP01 - “Dropoff” by Rob Berkowitz Hitscanners everywhere! That's the main type of enemy, so cover should be used wisely. I didn't find the Berserk secret very useful, given this type of gameplay. The layout and detailing is very primitive, with mostly square rooms and hallways flood-filled of that grey computer panel texture. The final room is the most interesting, as you raise multiple bridges in the shape of a pentagram. The midi is a total banger, so the new soundtrack is something to look forward to. -

The DWmegawad Club plays: I C H I N I C H I
Spectre01 replied to dobu gabu maru's topic in WAD Discussion
MAP30 - “Goodbye” I actually had to open up UDB to check how to exit the map. Those 2 pillars with Exit on them do not look like usable lifts. I assume it's meant to be more cinematic than anything, as the enemies in the main building mostly infight to death. The Vile wave creates a bit more pressure, though nothing that can't be controlled with the BFG. Bonus points for not being an Icon of Sin map. Final Thoughts Very impressive for a set of speedmaps. The visuals and layouts are interesting throughout and texture alignment is generally very good. The maps are unique and don't feel like rehashes of similar ideas, which can happen in one-man megawads. The pistol start experience is pretty smooth and rarely frustrates with resource starvation and obscure weapon placement. Combat is on the easier side but there is difficulty progression, with E3 having the most bite. Not every set needs to abuse the player and this is a good example of classic gameplay. As far as criticism, there is some questionable usage of sound blocking lines which I haven't really seen before. It's strange to see enemies, which should be active, falling asleep and just standing with their back to you, on occasion. There is also no thematic consistency or story tying the maps together. I like having some sense of progression, even if it's the usual Techbase > Variety > Hell that many megawads end up being. Hit maps: 10, 18, 23, 24, 27 Misses: 13, 32 Final score: 3/5 -

The DWmegawad Club plays: I C H I N I C H I
Spectre01 replied to dobu gabu maru's topic in WAD Discussion
MAP26 - “Aka Desu” Red brick, we meet again. Despite the 4 teleporters in the starting room, this map is very linear. Ammo is a bit of an issue, especially shells, and I can't imagine having a good time without the secret BFG. It's not a tough map, but there are a lot of Revenants to dodge in close quarters. MAP27 - “Regenerations” This one's got a cool layout. It's hallway heavy, but I like how it loops and has you traverse previous sections from above. Gameplay is very straightforward, with less traps than the more Plutonia-esque previous maps. It's mostly incidental encounters with small groups of enemies where you take out the hitscanners first. Ammo is also more plentiful than in the last map. The finale is circlestafe 101, as the mix of high damage enemies are great at destroying themselves. MAP28 - “Castle of Corruption” Being dropped into a small room with 4 Viles and 2 Cacos isn't something I expected from this wad. I'm sure the secret BFG makes it way easier but I only found it after clearing the rest of the map. I'm not a fan of this type of design, where X is significantly more challenging if you didn't do objective Y first. It makes no difference on repeated playthroughs and only punishes first-time players. The start of the map is also more hostile than usual, having to fend off Arachnotron snipers above and hitscanners below with no immediate armour or weapons. The Cyber placement is, once again, non-threatening and ends up being a plasma tax and time waster. I do appreciate cell ammo being plentiful and letting the player go wild with the Plasma Rifle. MAP29 - “Pop” A bit of incidental warmup before the main fight opens up. There is little threat from the enemies outside; space is plentiful so it's easy to run circles while BFGing anything in your way. The main danger is from the Cybers wandering around indoors, as they can be hard to see through the midtextures and it's possible to eat a random rocket if they infight. Overall, easy enough for anyone who has played a slaughtermap. -

The DWmegawad Club plays: I C H I N I C H I
Spectre01 replied to dobu gabu maru's topic in WAD Discussion
MAP21 - “Brisk” This one's a banger - cool layout and consistent theme with the switches opening various fights. The visuals are great too, tastefully combining the vanilla Hell textures. MAP22 - “Embedded” I don't like how the Plasma Rifle is off to the side like that. The player is gonna have a bad time if they miss it. Also, the number of lifts is not the best for smooth navigation. Otherwise, I like the contrast between the white rock outdoors and red underground. MAP23 - “Tech Gone Naughty” Straight line techbase to the end and back. The unleashed Viles provide the most resistance of this wad yet, especially with all the hitscanner chip damage going around. My health got dangerously low, but the Megasphere secret is a good way to top up. MAP24 - “Epping” Very Plutonia with the low monster count and lack of significant fodder enemies. The Cyber is mostly harmless, with his rockets hitting the barrier while your plasma easily travels over. The final area with the sector trees and Revenant grave looks really nice. MAP25 - “Putrid” Not a fan of shotgunning that Baron at the start or the Mastermind that shows up later. On the upside, there are plenty of rockets in the 2nd half of the map, though shells are still pretty scarce. I like the usage of those light, square textures combined with the nukeage. -

The DWmegawad Club plays: I C H I N I C H I
Spectre01 replied to dobu gabu maru's topic in WAD Discussion
MAP16 - “Tortured” It's nice to start with the SSG, and the Chaingun can be bumped through the fence behind the player spawn. The large outdoor area is cool, as most of the maps so far have been compact indoor spaces. The fights don't put much pressure on the player, but they're still fun to blast through. MAP17 - “Map UAC” I got the blue key by straferunning from the SSG and then spent a while trying to figure out the intended progression. MAP18 - “Creep” Dark and claustrophobic maps aren't always fun to play, but this one does a great job of creating tension and crafting fights with the low visibility in mind. The Arachnotron hallway is particularly memorable for its presentation, even if the fear is dispelled by firing 3 rockets. Cool map, one of the best so far. MAP19 - “The Big Sad” Non-linear layout and the hub is full of snipers. Seems better to collect the resources outside each side area first before heading into them proper. I ran out of shells trying to get the Vile through all those Pinkies. The secret BFG is a nice bonus, though I only got to use it on one Baron. MAP20 - “C Plus” I like the multi-floor layout of the starting building. Makes the map feel much larger than it is when you revisit locations from above. Also, there are way too many rockets for the mostly low-tier enemies you fight. Nice non-secret signature by ignoring the teleporter linedef. -

The DWmegawad Club plays: I C H I N I C H I
Spectre01 replied to dobu gabu maru's topic in WAD Discussion
MAP13 - “Dirty Laundry” It's a sewer level, everyone's favourite theme. The start is a bit dangerous until you get some armour. Otherwise, this map is pretty straightforward. MAP14 - “Around She Goes” The interesting part here is getting the 2 Masterminds to infight. I can't imagine sitting there and pumping them with rockets. MAP15 - “Diamond Mines” I'm not a fan of hot starts and scrambling for resources while avoiding enemies. The fun in these maps starts when I have what I need to fight. Somehow I ended up with 43 rockets in my bag before finding the RL. The platforming sequence for the secret exit was also communicated well and easy enough to memorize. There seems to be a tendency for monsters to just stop and deactivate in several maps of this wad. I opened this map up in UDB and there is an excessive amount of sound blocking lines. There's something about vanilla infighting where monsters can stop being active if they fight, their target dies, but they haven't heard the player yet. MAP31 - “Boom!” The start is a bit annoying without any armour, and there isn't much health if you happen to take damage early on. Otherwise, the barrel gimmick is less offensive than Doom 2's map23 and the fights aren't particularly challenging. I do like the aesthetic, even with the liberal use of Fireblu. MAP32 - “Himitsu” The Cyberdemon duel at the end is interesting, but I was disappointed that the dark sectors weren't damaging. Would've been more exciting if the player had to stay on the bright sectors and think more about dodging and positioning. -

The DWmegawad Club plays: I C H I N I C H I
Spectre01 replied to dobu gabu maru's topic in WAD Discussion
Time for some catch up. MAP06 - “The Host” The start makes this seem like the type of map where you use the Cyber to infight, but the packs of enemies which get released are either too low tier or small in number that it's not worth it. I just killed the Cyberdemon early on with the SSG, as you get plenty of shells at the start. With him out of the way, it's a spacious and relaxing map, especially with how many rockets are given. MAP07 - “Bay 7” Spacious techbase with an e4m9-like aesthetic. Pretty laid back gameplay, especially when given the Plasma Rifle and 2 cell packs early on. MAP08 - “Bliss” Nice looking Inmost Dens homage that doesn't feel like a speedmap due to its more elaborate layout and detailing. That key trap with the Vile seemed a bit awkward to avoid, so I just took the hit. MAP09 - “Pinnacle Olive” Interesting use of those, generally awful, cement textures. I like this map but take issue with the secret RL. Now, I found it in my playthrough but see no good reason as to why it's in a secret. The map slowly feeds you rockets and having it against the larger mid-tier fights is more fun than grinding them down with the SSG. MAP10 - “Ed” This may be my favourite map so far. The visuals work very well, especially that sky texture used as a decoration. It looks like the north side is better to do first to get that SSG and RL early. The BFG secret is overkill for a map with SSG-sized encounters but it's still a lot of fun to use on larger packs of enemies. Plenty of rockets and cells too, which leads to more fun even if the fights don't demand their use. MAP11 - “Team Rocket” As the map name implies, it's all about RL gameplay with some plasma mixed in for the smaller indoor fights. MAP12 - “Eetoem” Pretty large map with more backtracking than usual. It's an interesting decision to put the BFG in a non-secret side area. It's certainly useful for the blue key Vile trap. My one complaint is the "prickly" gameplay at the start. The blue armour is not in an obvious location, so you're forced to fight mid-tiers with 100HP and no protection. It's not something I personally enjoy since it can lead to some frustrating deaths to highroll Rev missiles and the like. -

Arriving Early - 15 MBF Compatible Levels (RC3 Available)
Spectre01 replied to A2Rob's topic in WAD Releases & Development
Does the wad break in MBF21 complevel? I ask because I remember regular MBF having different infighting mechanics, which I never liked as they were far less predictable. -

The DWmegawad Club plays: I C H I N I C H I
Spectre01 replied to dobu gabu maru's topic in WAD Discussion
MAP05 - “Metallic” The start is a bit tense with no armour and limited shells. Since resources are low, the Pain Elementals encourage a lot of retreating and cover shooting them down before they waste too much of your ammo with Lost Souls. I finished the map with quite a bit of rockets and cells, which would've been nice to have earlier on. -

The DWmegawad Club plays: I C H I N I C H I
Spectre01 replied to dobu gabu maru's topic in WAD Discussion
MAP04 - “The Archives” A dark library theme is always a good choice when working with Doom 2's stock textures. Wood and metal is a winning visual combination and the final arena looks really good with the orange sky ceiling. Goes to show how Doom doesn't necessarily need high sector counts and micro-detailing. The bright outdoors with the red brick is much rougher on the eyes, but it's hard to make that texture work - especially when it's flood-filled. I liked the outdoor blue key fight the most, while the finale felts a bit under-cooked. There is too much space for the modest monster count and only the PE has any impact. -

The DWmegawad Club plays: I C H I N I C H I
Spectre01 replied to dobu gabu maru's topic in WAD Discussion
MAP03 - “Foundations” Fun map and I really like the aesthetics of the final area. However, I will take this opportunity to rant about weapon placement in general. This map gives you 3 main paths leading out of the starting room, and the SSG is sitting away in the small hallway behind the player. It's in an optional section of the map, that's not linked to progression, but picking it up early heavily influences the experience. It's more enjoyable taking out Pinkies and mid-tiers with the SSG than grinding them down with the regular Shotgun. Why not just place the SSG in the starting room or on the left path, which you're supposed to take first. This kind of placement essentially griefs the player if they don't happen to check that hallway early on. And it happens all the time in Doom maps, both classic and modern. I've seen streamers describe this as "find the good gun", where you run around a non-linear map avoiding enemies until you find something better than a Shotgun or Chaingun. Now this is a short and easy map, so it's not a big deal, but I've played longer and harder maps where I ended up finding a Rocket Launcher or Plasma Rifle after most enemies were dead. It's a symptom of the old school Pistol Start balance of the IWADs, and I much prefer how later games just spawned you with all the weapons you're supposed to have acquired at that point when choosing to clean start a chapter from the menu. Finally, I noticed that this Imp was stuck. -

The DWmegawad Club plays: I C H I N I C H I
Spectre01 replied to dobu gabu maru's topic in WAD Discussion
Let's see if I can do more than 4 maps for this month before something comes up. DSDA-Doom, UV pistol starts with saves, and short writeups. MAP01 - “Hello” Despite a very modest monster count, this map has a good variety of indoor and outdoor areas with some interesting shapes. It seems the author was inspired by Plutonia's opener, and I can see that from the enemies used, although the traps aren't nearly as mean. Pretty straightforward and satisfying combo or Berserk and Chaingun gaming. MAP02 - “Industry” Not a huge fan of this hot start but the map does get more enjoyable after grabbing the SSG and blue armour. I like the clean aesthetic and functional detailing. -

The DWmegawad Club plays: Sign of Torment
Spectre01 replied to dobu gabu maru's topic in WAD Discussion
MAP04 - “Legacy of Blood” I wonder if anyone in this thread will 100% this one. I did not find either of the white keys and ended up with around half the secrets after 40 minutes, despite finding the Computer Map. The strongest aspect is still the atmosphere, Boom features like silent teleports, and general weirdness in the design. I also appreciate the plentiful ammo. The combat is serviceable but is still mostly clearing rooms of the monsters placed there. The layout is also extremely flat, even compared to the previous maps. It reminds me of Doom 2's Refueling Base, where it's a bunch of distinct rooms connected by doors and hallways that don't really interact with each other. My least favourite effect is the red screen when entering some of the blood, which is rather unpleasant on the eyes. Overall, this map feels like it's too large for it's own good and I've seen every trick by the halfway point. -

The DWmegawad Club plays: Sign of Torment
Spectre01 replied to dobu gabu maru's topic in WAD Discussion
MAP02 - “The Loudest Silence” Interesting progression with how you hit dead ends, backtrack, and come back again later. It goes against modern layout conventions, but works as part of the weird atmosphere the wad is going for. Something like the red key teleport taking you to some optional armour bonuses is certainly a head-scratcher. The visuals also range from having cool bits of detailing to really blocky "my first 90s wad" depending on the area. Texture alignment seems optional. Combat is very straightforward incidental stuff without any surprises. Also worth noting are the solid hanging corpses, which can obstruct movement wherever they appear. MAP03 - “Dark Lantern” Alright, this is cool stuff. Finally the combat is picking up. The room pictured above has an engaging combination of hitscanners and Revenants, and the way areas repopulate silently is also neat. Visuals are also at their most distinct so far, with random patches of void, those black and white transitions, and the awesome spiral staircase. The midi is also a perfect pick for the atmosphere. -

The DWmegawad Club plays: Sign of Torment
Spectre01 replied to dobu gabu maru's topic in WAD Discussion
This set looks interesting, so I'll give it a go. Is continuous play recommended because of extra tight ammo balance? I guess I'll find out. DSDA, UV, pistol starts for now. MAP01 - “Rooms and Shadows” Interesting visuals. I like the floating platforms and how you can see them from the windows in the main building. Gameplay is straightforward Tyson, with the Shotgun secret being useful for removing those elevated Imps. -
I noticed some strange behaviour in map07, where autoaim for hitscan weapons stopped functioning in some spots. For instance, it was impossible for me to shoot those zombies from this location (and outside of the house). I was able to autoaim with rockets or hit them if I moved closer. It also seemed like the blockmap bug was acting up more than usual, with bullets just passing through some enemies in several locations. Since the map is massive, it's likely the NodeBuilder is acting up. Other maps seemed fine. Port is the latest version of DSDA Doom and complevel 2.
-
Is there an option to adjust sprite clipping in OpenGL? I believe there was one before, with settings like Smart and Always, similar to how it is in GZDoom. Otherwise, sprites get cut off as they clip into the floor. (Notice the Zombieman's hand and feet.) This is how it's supposed to look like (using Software mode), and other GL ports have the option I mentioned above to make it look similar.
-
Hey, thanks for the kind words! I haven't been much of a gamer lately, besides the occasional Hearthstone. I've done a bit of mapping but nothing too serious, so there hasn't been major progress on this project or the other stuff I've wanted to make. It will happen eventually but right now the passion isn't really there.
-
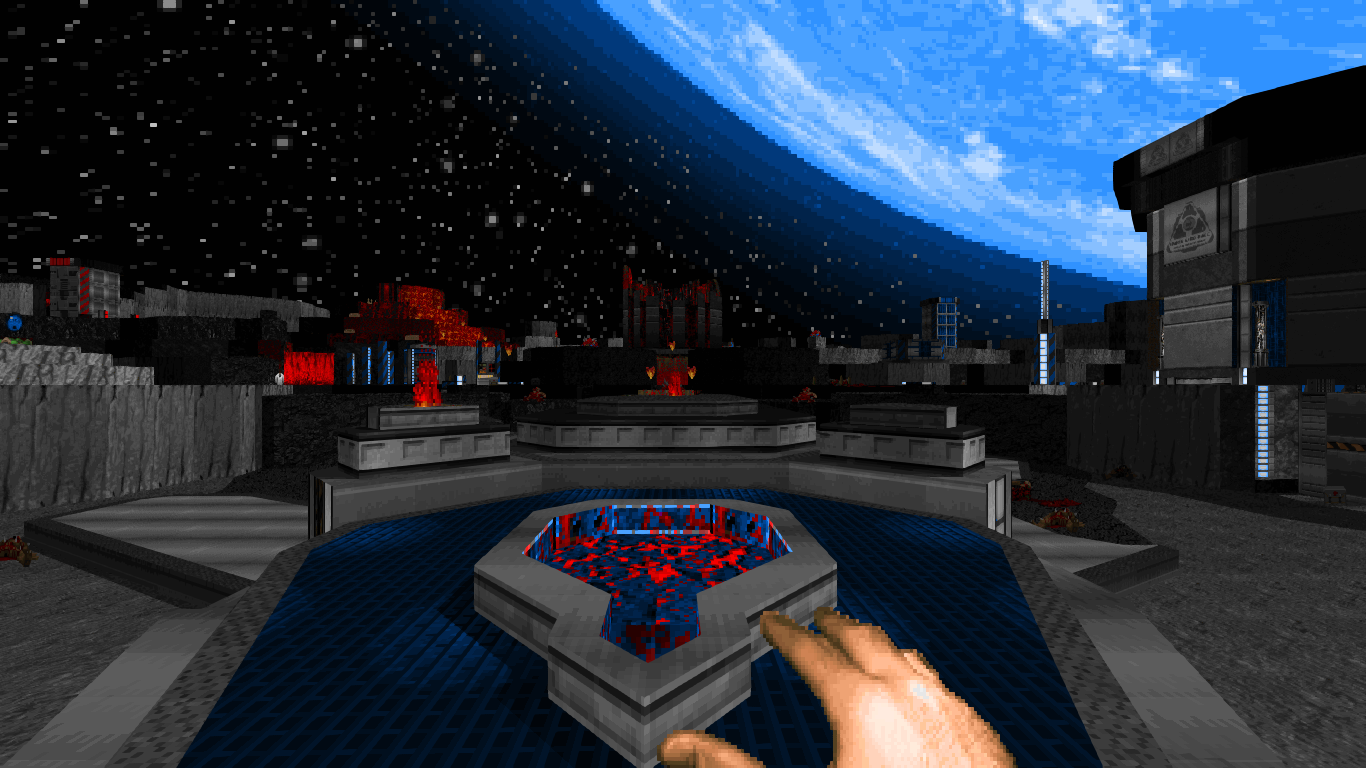
I am excited to share something new I've been working on! Moonfire is planned to be a short (~6 map + secret), Boom-format, Lunar-themed episode of medium to large maps. Rather than making a traditional techbase + Moon set, like E2 of Duke3D, I am aiming to explore a variety of hellish and other surreal themes as well. Continuous balance is also something I'm interested in supporting more thoroughly. I currently have one map to share, with the rest at various stages of development. Difficulty settings are implemented and any feedback on HMP or HNTR would be appreciated. My goal is to design around HMP and then tune encounters for other difficulties. UV is where I have fun trying to challenge myself and may require some degree of familiarity and meta-knowledge of the map and its mechanics. Some sections are inherently difficult, so HNTR is no walk in the park. Berserk punching proficiency required at the start. Enjoy! Tested mostly in PRBoom+, GLBoom+, and GZDoom. Special thanks to @rdwpa for detailed feedback and @Saint_Guy for brief but humorous comments. map01 demo: Download More screenshots (all from map01): Bonus: While designed around classic Doom gameplay and mechanics, I also tested all difficulties with @Tango's Supercharge! Just make sure to change the Fusionite's attack origin to vanilla in the options. Resource credits:
-

The DWmegawad Club plays: Solar Struggle
Spectre01 replied to dobu gabu maru's topic in WAD Discussion
E2M2 - “Storage Complex” by Wavy This is a solid interpretation of the classic, and fan-favourite, Containment Area from Doom 1. Storage Complex is large and very diverse when it comes to visual themes. Each location introduces either new textures or different type of geometry. Proponents of visual cohesion may not like this, but it's part of the charm of Containment Area as well, which introduces marble and tech after the initial crate maze. Speaking of crates, 3D navigation is fully realized by being able to climb the boxes, similar to TNT's map11. I also like the overall darker lighting in this level, which adds a greater sense of danger as you navigate around each corner. Gameplay is a standard mix of Shotgun and Chaingun swapping based on ammo. There is a Chainsaw/Berserk, but they aren't nearly as useful as in Containment Area since this map's enemies like to appear on top of boxes and otherwise out of melee range. Cool map. This tech wall is probably my favourite bit of detailing for how simple but effective it looks.


